CRAYON CANDLE DIY

Materials:

– Dixie Cups

– wax (available on Amazon)

– crayons

– wicks (available on Amazon)

– votives

– popsicle sticks (for stirring)

Tools:

– microwave

– a plate stand for propping up (available on Amazon)

Pour a small amount of wax into a dixie cup. Microwave for one minute. Stir and pour a thin layer into the bottom of a votive and place the candle wick in the center. Let harden.

Now it’s time to prep those crayons. You can use an Xacto knife to peel off the paper.

Use one crayon per color. Fill the Dixie cups with wax and then top with a broken up crayon. Microwave for two minutes. Stir. Then microwave for another two minutes.

Prop your votives (with wicks) on your plate stand and pour in the colored wax. The goal is to create angled layers of color. Let the first layer dry for 20-30 minutes.

Turn the votives around, and pour the second layer so you get another angle. Let dry for 20-30 minutes. Place the votive flat on your workspace to pour in the third layer.

I love the bright pink of this third layer! Let the third layer dry for an hour before lighting up.

And you’re done! There are so many possibilities for color combos – it’s hard to choose just one. Place them on your dresser, nightstand, or on your desk. These would also make really fun favors at a colorful wedding.

Which color combo do you like best? Have you done any other DIY projects using crayons? Make sure to comment below 🙂

Gooey S’mores Brownie Cups Diy

Gooey S’mores Brownie Cups

Ingredients

1. Box Betty Crocker™ fudge molten lava brownie mix

2. Water, oil and egg called for on brownie mix box

3. 12 large marshmallows, cut in half

4. 1/4 cup graham cracker crumbs

5. 2 bars (1.55 oz each) Hershey’s™ milk chocolate, broken into 24 pieces

Steps

1. Heat oven to 350°F. Place foil baking cup in each of 12 regular-size muffin cups; spray bottoms with cooking spray.
2. Make brownie batter as directed on box. Fill muffin cups with about 2 heaping tablespoons of batter. Squeeze fudge pouch about 10 seconds. Cut 1/4-inch tip from corner of pouch. Divide fudge equally among muffin cups by squeezing a small amount on top center of brownie batter.
3. Bake 18 to 20 minutes or until edges and tops are set. Remove from oven, and top each brownie cup with two marshmallow halves; return to oven 1 to 2 minutes or until marshmallows are softened. Cool 5 minutes in pan. Remove from pan; cool 5 minutes. Top each with 1 teaspoon graham cracker crumbs and 2 chocolate bar pieces.

SUPER EASY DIY ON GLITTER VASE

If you’re looking for a fun DIY that makes your space instantly sparkle, these shot-glass vases are a real stunner. For about a dollar apiece, you can turn a few ordinary shot glasses into cute vases. Group a few together on a table or line them up in a row for a fun and pretty way to display flowers. These sparkling shot-glass vases would make beautiful wedding decor or favors.

What You’ll Need:

  • Tall shot glasses
  • Painter’s tape
  • Mod Podge
  • Paintbrush
  • Glitter
  • Sheet of scrap paper
  • Clear glaze spray paint

Directions:

  1. Using painter’s tape, cover the parts of the shot glass that you want to remain clear and unglittered. Try mixing it up on each glass: you could cover half the glass, a third of the way from the bottom, or almost to the top of the shot glass. In addition, tape over the top of the shot glass, which keeps it protected later.

  1. Place a sheet of scrap paper over your work area, and sprinkle it with glitter. Now coat the uncovered part of a shot glass, except for the bottom, with Mod Podge. Roll it in the glitter, and then place it to the side while working on the other shot glasses.

  1. After 20 minutes, touch up the glittered shot glasses as needed, and let them dry for an additional 20 minutes. Take them outdoors or to a well-ventilated area, and cover your work surface with scrap paper. Use the clear glaze spray paint to coat the glitter in a protective coating. Let dry.

  1. Remove the tape from the shot glasses, and enjoy the sparkle!

DIY POLAROID PICTURE FRAME

polaroid crafts | polaroid frame craft

All you need for this Polaroid Project is:

  • Picture Frame
  • Cardstock
  • Polaroids
  • Other keepsakes: (dry flowers, party invites, movie stubs, confetti)
  • Glue

DIY Polaroid Frames at https://diyprojects.com/diy-polaroid-frame-project

Step 1: Arrange

Hang up your Polaroids! | DIY Polaroid Frames

Arrange the polaroids and keepsakes on your cardstock. Glue them down once you like the layout.

Now you’re done! What’s the point of having a Polaroid camera and throw out or lose the beautiful pictures that you take? Now you have a safe place to put them and admire them on the walls of your bedroom.

DIY ON OMBRE ARTWORK

Homemade Ombre Custom Artwork

Materials Needed:

  • pencil
  • ruler
  • 24″ x 18″ stretched canvas
  • seven disposable plate
  • Red paint
  • White paint
  • mixing stick
  • 1″ polyester paintbrush

Step 1

Use a pencil and a ruler to draw a 2-inch border around the canvas so the painting will be centered. The pencil lines along the edges will guide your first brushstrokes.

Step 2

Pour red paint onto a plate; this will be your starting color. Mix the red and white paints together in the remaining plates so you have six more shades, from dark to light.

Step-by-Step: Custom Artwork

Step 3

Starting with the darkest paint, make a single brushstroke from top to bottom on each side of the canvas. Follow your pencil line for guidance.

Step-by-Step: Custom Artwork

Step 4

Wash the brush, pat it dry, then repeat with plates 2 through 7. The single center stripe will be the lightest color.


DIY FLOWER PENS

What You’ll Need for these DIY Flower Pens:

  • Ballpoint pens
  • Floral tape
  • Artificial daisy flower
  • Super glue or hot glue gun

Your ballpoint pen should look like the following photo.

If you ever wanted to know how to make flower pens, look no farther. Here’s a simple step-by-step tutorial that will show you exactly how to make this fun craft! Plus DIY flower pens are perfect as homemade gifts!

Remove the cap and the plastic cap from both ends of the pen.  Save the pen cap, but discard the plastic end piece.  Sometimes you can pry the end cap off neatly, but if it is difficult, cut it off with a pair of sharp scissors.  Since the floral tape and flower will cover the end, it won’t matter if it cracks or is broken on the end.

If you ever wanted to know how to make flower pens, look no farther. Here’s a simple step-by-step tutorial that will show you exactly how to make this fun craft! Plus DIY flower pens are perfect as homemade gifts!

Wrap floral tape from the top of the pen all the way down to the writing point of the pen, then replace the pen’s cap.Your artificial flower should have a stem like the following photo.  If your flower has a long stem, cut it to about 1/2 an inch long.

If you ever wanted to know how to make flower pens, look no farther. Here’s a simple step-by-step tutorial that will show you exactly how to make this fun craft! Plus DIY flower pens are perfect as homemade gifts!

Put a generous drop of glue in the top of the pen, where the plastic end cap used to be.  You can use your favorite craft glue, super glue, or a hot glue gun.

If you ever wanted to know how to make flower pens, look no farther. Here’s a simple step-by-step tutorial that will show you exactly how to make this fun craft! Plus DIY flower pens are perfect as homemade gifts!

Stick the artificial flower stem down into the pen.

If you ever wanted to know how to make flower pens, look no farther. Here’s a simple step-by-step tutorial that will show you exactly how to make this fun craft! Plus DIY flower pens are perfect as homemade gifts!

There you go. And that’s how to make flower pens! They look amazing like the ones you can buy at a store. They are even comfortable to write with.

DIY ON MASON JAR SNOW BALL

What you’ll need:
A jar that seals
Distilled Water
Liquid Glycerine
Glitter
Figurines
Epoxy/Crazy Glue
Clear Gloss Mod Podge Sealer
Coat your figurines in the Mod Podge Sealer and let dry. This should help your figurines keep their coloring. Once the figurings are dry, use the Crazy Glue to attach them to the lid of the mason jar. Let them dry completely. (I waited 24 hours to be sure.)
Next, fill your jar almost to the top with distilled water. Add a dash of liquid glycerin (this is used to make the glitter fall more slowly). The amount is glitter you add is sort of at your own discretion. I ended up experimenting and some of mine have a lot of glitter and some don’t.  😉 Screw the cap on tightly and shake your jar to get the glitter moving.
And you’re done! Give your Christmas decorations a pretty handmade touch this year using this easy tutorial!

SUPER EASY DIY ON A WHITEBOARD

Easy DIY Whiteboard

These are SO SIMPLE. This is all you need:

  • One frame from the dollar store (Mine were for 8″ x 10″ photos)
  • One piece of fancy scrapbook paper
  • Dry erase markers                                                                                                                               DSC_5958                  DSC_5969 
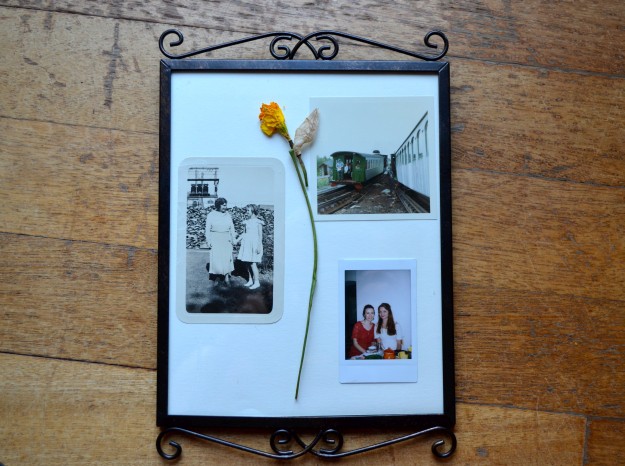
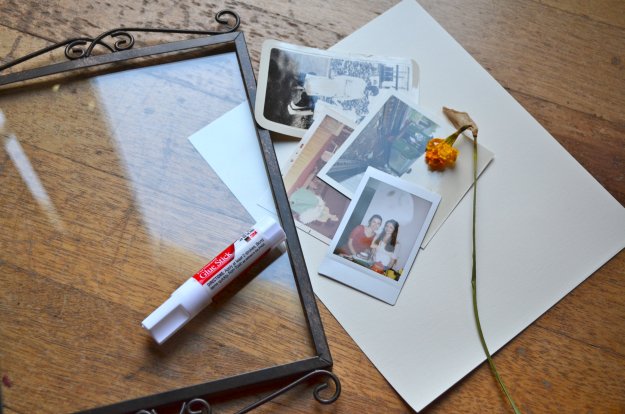
Remove the back, and add in your fancy scrap booking paper.                                        DSC_5983 The dry erase markers wipe right off the glass in the frame! So you can use it over and over again!

DIY ON DIFFERENT KINDS OF DOUGH

Please read the post to see the exact way to make the dough so they work for you rather than just the ingredients on the picture. 

Another ingredient that isn’t needed one but makes the play dough texture better is cream of tar tar. It could be bought in the baking aisle of most shops and it comes in little sachets. You either need half a sachet per dough or 2 tablespoons per dough mix.

A few things to note:

~ Use cream of tartar if you have it         

~ Work in more flour if the dough is very sticky         

~The more you work the dough the firmer it will be                       

~ To make it easier to color you can mix the food coloring into the water before adding that to the dry ingredients 

~ Store in an airtight container